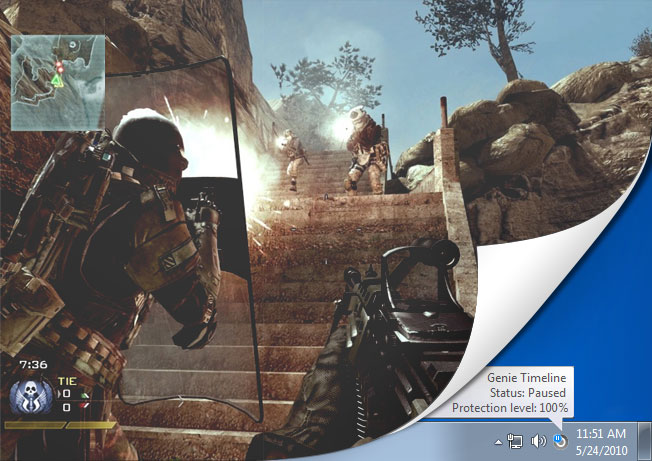
Posts tagged Timeline 2.0

Timeline for Gamers

Are you a hardcore PC gamer?

You’re probably thinking about upgrading to the new i7 or spending days online shopping for a monster PC capable of running games at the highest quality with no glitches, crashes or errors?

Interruptions by applications such as anti-virus software or backup software while playing can be a real hassle and can affect computer performance leading to a bad gaming experience.

With the user always in mind, Timeline was designed to function in multiple performance modes; if you chose Timeline’s Smart Mode you will never have to worry about it using up your memory. As an added bonus, Timeline includes Game/Movie Mode which automatically pauses Timeline’s backup operations whenever it detects that a game is running in full screen mode. Once you are finished playing, Timeline will automatically get right back to backing up your files.

Games_Blog

But the most important function remains the Disaster Recovery backup; 24 hour backups of your boot drive means that if your computer crashes and you cannot get it to boot again, you can restore your system back to a previously working state along with all of your games, configuration files and save files in no time, making Timeline the ultimate backup tool for every gamer.

How do you use Timeline

Timeline was created with the end user in mind. It is a backup tool that can easily work for anyone from an accountant, to a gamer, to a stay at home parent.

People use computers for many reasons; different schedules and ways in which computers are used result in custom backup schemes and plans. Whether you are a doctor or an architect, you backup all of your drives or create specific rules and backup certain extensions; we would like to hear from you.

In the comment section below please write to us about how you use Timeline to backup.

Guinness world record holder trusts Genie Timeline 2.0

I have used many backup products that either slow down your computer take a large footprint and are mostly unwieldy and cumbersome to use, added to which you have to be more than just a computer user some require that you become a computer genius to use them…. and then along came the Genius of all backup programmes; Genius has been slightly shortened to become Genie and you only have to try Genie once to instantly realize here is something different. I stated by using Genie Backup Manager Professional a dream to use.I travel so much that my laptop suffers more bangs and knocks than most, so a totally reliable and easy to use backup system is essential and Genie provides this and much, much more.

Genie also have a support team that is helpful are also on Skype and other communications media so very easy to get in-touch and the response is always knowledgeable, polite, and quick. The other back up managers, the ones that need computer knowledge, don’t have the response time that Genie has and their answers are so ambiguous that once again you need to be more than a computer user to work out what their eventual reply is all about.

Then just as I thought that Genie was just about perfect they brought out Genie Timeline Version 2 for me this is the ultimate for a computer user like myself. Genie Timeline 2 after an easy installation does everything itself not shall I do this or shall I do that it does the thinking for you. After installation Genie Timeline Version 2 is the very essence of user friendly small footprint doesn’t slow down computer, one click and it does initial full back up, creates disaster recovery partition on your hard drive which really works I have tried it and it works perfectly. There are multiple choices as far as where you want to back up to external hard disk drive or other media. After full back up Timeline then just backs up any new files and an icon in the taskbar lets you know you are 100% protected. The Genie Timeline is easy to go back on the time line and look at files just as though you were in Windows Explorer. Since I have used Timeline 2 from Genie I haven’t had to touch it or make any adjustments to settings and yes I am 100% backed up to an external hard drive. Genie is Genius and it does exactly what it says on the box, brilliant ease of use, thanks Genie for producing the easiest safest system for people like me to use and make me feel like am expert without the knowledge.
Best wishes from

Fred W Finn MBA. F.Inst.T.T.
World’s Most Traveled Person
Guinness World Records
15 Million Miles
718 Flights in “Concorde”

Backup SMB and SOHO

Do you own a small/medium sized business? Are you looking to take initiative and go ahead with your startup business?

SMB’s and SOHO (small office/ home office) are becoming a growing trend as an alternative work or business model; whether your business type or industry is internet based or you work in retail, computers & electronics, arts & entertainment, media or any other type of small business, data and system protection is something you must ensure.

Timeline is a perfect solution for such scenarios; setup the backup to a connected NAS and enjoy the benefits of never having to worry about employees forgetting to backup, backups failing or missed schedules.

SOHO-network

Finding your NAS from Timeline is easy, if you have the network drive already mapped the drive will appear directly in the recommended drives section of the page, alternatively you can use the “Select a different destination” button to have the option of manually entering the UNC path to your NAS or browsing to it in Windows Explorer like window.

You might ask “You mentioned system protection, does that mean if a computer crashes the employee can recover his pc without any significant down time?”

Yes, 24-hour Disaster Recovery backup ensures that your system can be recovered back to a previous working state along with up to date files and folders swiftly and painlessly.

You can also refer to these blog posts for more information about Timeline and backup setup:

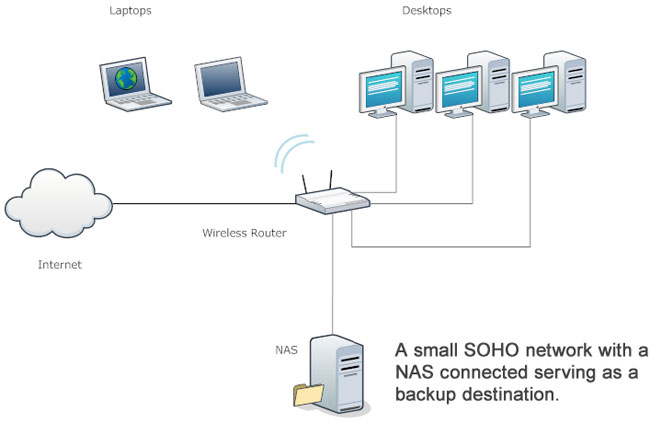
Managing Backups in home networks

The concept of continuous data protection appeals to households that contain a number of computers with daily changing data. As households nowadays have more than one computer that the family shares, with almost every member of the family using their own desktop or laptop; having an automated backup process to count on is a necessity to avert a disaster and prevent loss of all your files.

Timeline is the perfect tool for such a network of computers, the ideal setup would be to have an external storage device connected to a wireless router, you can check out our post on how to setup a wireless external storage here, this gives the home wireless, continuous backup as long as they are within the range of the router, but what happens when the laptops are outside the range of the router?

That begs the question of “Will my backup stop and then continue when I return home?”

The answer is yes! You can take your laptop everywhere, universities, parks, the mall, maybe Starbucks to work on your latest novel. Timeline will continue to monitor any changes or additions to your files, as soon as you are back home and Timeline automatically connects to your hard drive, the files will be backed up on the spot.

So this means that you will no longer have to worry about the constraints of physically connecting your laptop to your storage device and waiting hours and hours for your backup to complete just to return next week and go through the same straining process again; that is if everything goes smoothly each time!

The next step would be to look into online storage; future versions of Timeline will have the ability to backup to FTP sites and the cloud which has limitless space possibilities. This step ensures that you will never have to worry about where you are, running out of space, or the safety of your data.

How to Backup to a wireless network drive

As our data increases in size and we start to worry about data loss, our demand for extra storage increases. Some files by nature are large files, others, like your email inbox, just grow out of their containers, fortunately external hard drives are getting larger and cheaper and a lot easier to use now that they can be accessed through wireless connection. The benefits of connecting your external disk to an wireless router instead of just plugging it directly to your computer is that you don’t have to worry about remembering to plug your external drive to your computer each time you want to backup, you can also use the same disk to backup more than one computer without having to move it constantly. This post describes the easiest way to connect your external drive to a wireless router and configure Timeline to backup to it.

If you already have an external drive with an Ethernet port and a router, what you will need is an Ethernet cable, connect the router and the external drive with the Ethernet cable connected through the Ethernet port:


nas


Or if your router has an USB port that you can use to connect your USB external drive you should check the manufacturer’s manual on how to access the drive, as some USB ports are intended just for printers.

An interesting article from gizmodo shows how to get the most out of your NAS here


68589-router-usb-scaled


Now if you’re router is brand new you will have to install your routers software so it automatically configures, it’s just a couple of prompts and steps that vary depending on the brand of wireless router you have.

Now that both your router and external drive are switched on, the next step would be to map the drive from Windows.

Open your computer from Windows, and then from tools choose “Map network drive” this will open up a window that lets you browse to your drive choose a letter for your new mapped network drive.

When your drive is mapped and you can see it from your computer. Download and install Timeline on your computer, after the setup has finished you will be presented with the backup setup wizard, from step number one “Select backup drive” choose “Select a different destination” this will open up a Windows Explorer like window that you can browse to your external drive from.


mapped


After you have selected your new network drive, you can continue the rest of the backup setup and Timeline will start backing up your files and folders to your wireless external drive.

Tips & Warnings
• Nearly every major manufacturer makes routers that can be connected to external hard drives–including Linksys, Netgear, DLink and Apple. Not every router has this feature, and not every router with a USB port can be connected to a hard drive. Some are intended only for printers, so check documentation carefully before you purchase a router.
• If your network is not secure, intruders may gain access to everything on your network-connected hard drive. Be sure to take advantage of any security features in your network and/or router settings.

Disasters happen: always have a backup plan

Well known, trustworthy, reliable companies can even make mistakes: McAfee recently pushed out an update to computers, causing large amounts of machines to become completely inoperable. Though these situations cannot be predicted or prevented, we can still protect ourselves by planning ahead.

In this fast paced world, technology has been the key to keeping up. A computer is no longer just a machine that stores our data because our data has become our life. We go through many measures to try and protect this data, keep it out of harm’s way, make it accessible yet secure but sometimes incidents happen that are uncontrollable. It is almost impossible to make your computer immune to such disasters, though with the right precautions you can recover from these situations with ease.

Genie Timeline 2.0 is an innovative, new software which can do just that. Genie Timeline 2.0 is the next generation of backup software based on Continuous Data Protection, it needs zero maintenance, zero scheduling, and uses up zero resources; never will you need to worry about your data’s security again. The key is simplicity; creating a backup takes 3 simple steps and you are on your way. Timeline will work silently in the background constantly monitoring your files for additions and changes. Set it and forget it; backups will be taken periodically without any user intervention and will have absolutely no impact on system performance.

You can restore your files easily, whether you have suffered from a complete system failure as in the case of many McAfee users, or you simply want to go back in time to view a version of a file you made earlier, Timeline’s user friendly process makes it easy to restore.

Disasters happen, plan ahead so that you can easily recover from them…

How can we keep up in this fast-paced world?

In today’s fast paced world, data is becoming integrated into our lives more and more. Conventional backup utilities need constant user attention and scheduling to ensure that your rapidly growing and changing data is protected; with that attention comes the hassle and knockbacks of creating up-to-date and continuous backups.

Genie Timeline introduces a new generation of backup utilities based on Continuous Data Protection, your data is automatically and constantly monitored for additions and changes. Set it and forget it, backups are taken periodically without any hassle or pop ups and will have absolutely no impact on system performance.

Genie Timeline needs zero maintenance, zero scheduling and uses up zero resources, and with the future bringing cloud integration, your data can be stored safely on offsite storage giving you peace of mind.

The Disaster Recovery option in Timeline creates a backup of your boot drive, in case of system failure Timeline will restore your system to a previously working state along with all of your important data.

Creating backups has never been this simple, 2 or 3 simple steps and you are on your way, Timeline is smart enough to sense when you are using your computer or when it is idle and will take advantage of that fact to speed up backups.

Users can stay up-to-date with the status of their backup via email and very soon through their iPhone or iPad, which also provides a neat way of data archiving.

Timeline comes in three different versions; Free, Home and Professional.

You can check out a full comparison of the versions by following this link:
http://www.genie-soft.com/Free_products/Comparison.aspx